Intro
I recently decided to dive into the world of self-hosting. The main reasons being that 1. Last year I made a career switch from Astronomy to Software Engineering and I’m discovering that having a good understanding of Systems Engineering and Network Engineering really helps in this industry. So getting into self-hosting seems like a fun way to get some hands-on experience in this field. 2. Recent geopolitical events and the blatant disregard for ethics shown by American Big Tech companies have triggered me to get a better grip on my own data and to move away from cloud services. By documenting how I go about this I hope that I can help others that are interested in doing the same.
My situation at the start of this process is as follows:
- My files/data distributed over:
- Multiple laptops
- My desktop PC
- Google Drive
- Creative Cloud
- Dropbox
- One Drive
- No backup system
- Media streaming from:
- Spotify
- Netflix
- HBO
- Audible
- Nebula
- Simple Wifi network (using network provider router)
The situation that I would like to move to is:
- My files/data distributed over:
- A NAS (Network Attached Storage)
- My desktop PC
- 1 Laptop that is currently in active use
- An ethical, European, and reliable cloud storage service
- A 1, 2, 3 backup system for all my personal files and photos
- Self-hosted media platforms:
- Jellyfin (or Plex)
- Spotify alternative?
- A secure network set-up that has separate networks for:
- Trusted users
- Guests
- Home appliances
I am sure that the final set-up will differ from the one I’ve outlined above as I learn more. However, formulating it like this gives me some clear goals to move towards. I decided that step one in this process was to build a server.
Gathering the parts
I will be honest and admit that part of the reason that I wanted to start with this is that I really enjoyed building my PC and that this was a good excuse to build a second computer. A big difference in building a server instead of a gaming PC, is that there is less need to get the newest and best parts. This, along with the goal of building the server being to learn along the way, meant that I was ok with spending time scrounging for second hand parts which may or may not work (as we will see later).
After talking to friends and colleagues that already went down the self-hosting rabbit hole, looking through many online guides/videos/reddit posts, and scouring Marktplaats.nl (the Dutch version of Facebook Marketplace), I came up with the following component list:
| Component | Name | Cost new (estimate) | Payed |
|---|---|---|---|
| HDD SATA | WD Red Plus, 4Tb (64 Mb cache) | € 525 | € 189 |
| SSD SATA | Crucial MX500 250GB SSD | € 30 | € 25 |
| SSD M.2 NVME | Samsung 980 PRO 500gb | € 107 | € 35 |
| SSD SATA | WD Samsung 870 EVO 500gb | € 150 | € 30 |
| DDR4 RAM | G.Skill Aegis F4-3000C16D-16GISB | € 129 | € 50 |
| CPU | Intel i3-10100 | € 160 | € 55 |
| CPU cooler | Inter-tech Argus T-200 | € 12 | € 12 |
| Motherboard | ASRock H410M-HDV/M.2 | € 12 | € 12 |
| PSU | Corsair RM650x Zwart | € 100 | € 40 |
| Case | Silverstone SST-CS330B | € 219 | € 60 |
| Total: | € 1447 | € 551 |
Based on the current cost estimates taken from Tweakers.net, I’ve managed to save almost 1000 euros compared to if I would have bought all these components new. It’s true that some are not even in production anymore and so the “current” cost estimate is not very accurate anymore + older parts may be unreliable. Still, my inner Dutchman is quite content with the amount of money saved by going the "pre-loved" parts route. If it is worth it in the long run, only time will tell.
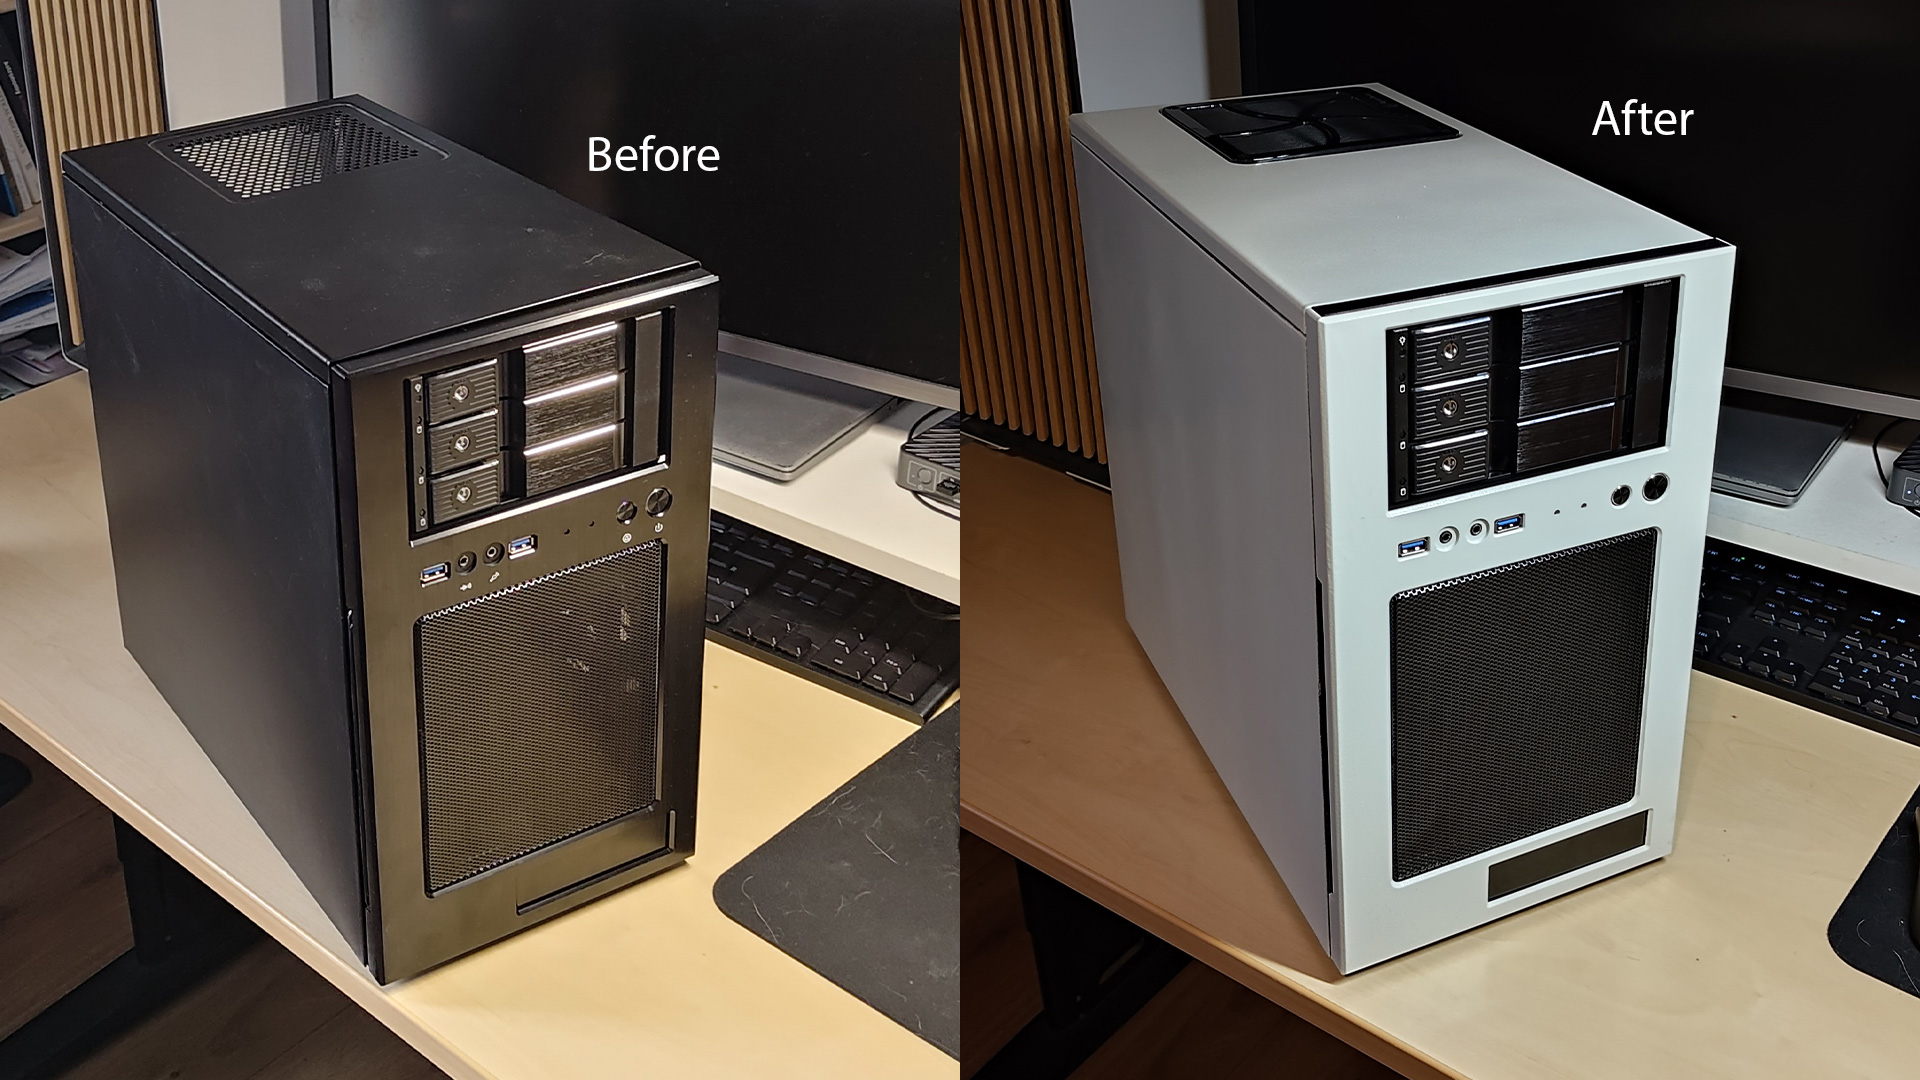
One part that I spent a lot of time thinking about was the case. My attention was first drawn by smaller form factors like the Fractal Design Node 304 or the AliExpress Sagitarius. Thing is, these are very cramped cases and I have enough room in my office such that a slightly bigger case isn’t an issue. The Silverstone SST-CS330B ended up being the perfect combination of not being too bulky while still having a lot of room for potential upgrades in the future. I’d already found the 3 HDDs, so the 3 front hotswap bays almost seemed made to order.
The only thing that I was still missing was the looks. I am very happy with the white Fractal North case that I have for my PC and wanted to have the server match the color scheme. I had never spraypainted a computer case before, but a trip to my local hardware store later I was armed with some metal degreaser (to clean the cases beforehand) and “all-metal” spraypaint which did the job perfectly (Hammerite Metaallak - Hamerslag Wit and Hammerite Metaal Ontvetter in case some Dutchies reading this wanting to try it themselves). I was also aided by the fact that all of the outside panels of the case could easily be unscrewed, so I did not have to tape anything off.
Building the server
I now had all the components, so all I had to do next was put them together in the right order and I would have a working server... right?
Kind of, but with a lot of extra steps. The first time I put all the parts together, I was a bit too confident and did not test if it would turn on before sticking everything in the case. Of course, when I then tried to turn it on, I was not able to get past POST (Power On Self-Test, the process where a computer basically checks if all the connected components are working and wont cause any issues). Any time that I’d click the power button, the CPU and PSU fan would start spinning for half a second before turning off again. I'll admit that at this point I was afraid that I messesd up something major.
I troubleshooted by taking the motherboard out of the case, plugging everything in and the unplugging components in order of least important to most important, kind of. For some reason I left the SATA SSD connected the entire time, and so after I had checked literally every other component (reaseated the RAM sticks, checked the CPU socket for any bent pins, done a paper clip test on the PSU etc.), I finally tried unplugging the SATA SSD connection and by god, it finally worked. Turns out that the SATA power cables (that came with the PSU) that I was using appeared to be causing the problem. Luckily I had a few more lying around left over from my PC build.
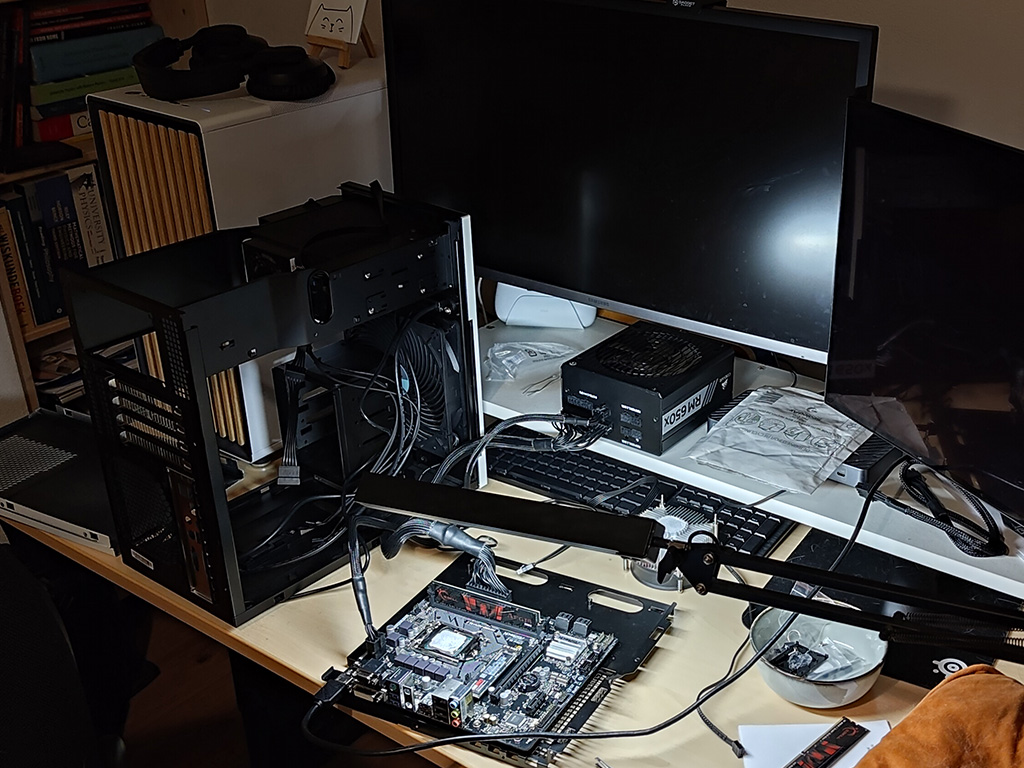
Finally, I was able to get past POST into the BIOS. I put everything back into the case and started up the computer again. All was good again in the world, except that neither the M.2 SSD or the SATA SSD were being recognized... The second was especially important because that is where I wanted to install the OS that I am planning to run on the server. After updating the bios, trying a million different cable and socket combinations, I despaired and went to a local computer repair shop to see if they could check if the SSDs were still working. Apparently both were toast... Luckily, the computer repair shop guy had another SATA SSD lying in the back with 500 Gb which he gave me for 30 eu (a decent deal, especially considering the time he took to check the other SSDs). This new SSD was thankfully instantly recognized instantly by the BIOS. My guess right now is that I accidentally roasted the SATA SSD with the faulty power cable. Why the M.2 SSD is not working is a mistery, I am currently leaning towards blaming my own naivety and being ripped off by the seller.
Installing Proxmox
With the hardware finally in order, it was time to install the operating system: Proxmox. An altered version of Debian which is specially made to allow for easy virtualisation. I prepared a flash drive using Etcher and plugged it into the computer, selected it as boot drive, and rebooted the server. I was then able to click through a very neat set-up prompt which then started the installation which... failed. Even after multiple tries it kept returning the error message:
installation of package skopeo_1.18.0+ds1=1+b5_amd64.deb failedWhat made the difference in the end was to torrent the image instead of downloading it from the site link and then using Rufus to prep the flash drive (honestly still not sure what the issue was, but I also did not care anymore at this point and just wanted it fixed).
Low and behold, I have a “working” server!
Between getting the idea to build and actually reaching this point took about one and half months (with the majority of the time spent on scraping together the parts). The main thing that I learned so far is that hardware debugging is even more frustrating than software debugging. In the next post (whenever that will be) I’ll be documenting the next steps of actually setting the server up to fulfill its role of helping me move away from Big Tech and into the nebulous world of self-hosting.